Test-driven development (TDD) in Flutter
Go from 🔴 Red to 🟢 Green in a Dash with Test-Driven Development (TDD) in Flutter.
What is test-driven development?
Test-driven development, or TDD is where you write your test before coding your logic, have the test fail, then write your code to make the test pass, and finally clean up the code.
Rinse and repeat and you got yourself following the test-driven development process, formally described by Wikipedia as a software development process relying on software requirements being converted to test cases before software is fully developed.

Why use TDD?
TDD allows a developer to focus on writing the bare minimum amount of code to satisfy the test, instead of looking at a 72 line method with 12 if statements, each containing 2 or more loops, and deciding “there isn’t enough time” to write the test.
We have all been there my friends.

That is why writing tests first ensures better test code coverage.
“If you want your systems to be flexible, write tests.
If you want your systems to be reusable, write tests.
If you want your systems to be maintainable, write tests.”
- Uncle Bob Martin
Source: https://sites.google.com/site/unclebobconsultingllc/so-you-want-your-code-to-be-maintainable
In my experience, 2 of the best benefits that come from following TDD is:
Less debugging
Keeping it simple and writing smaller, focused tests for each unit of work, creates a strong foundation of tests that easily detects a failure when a new feature is added or an old feature is refactored.
This leads to less time trying to find exactly where the issue is through debugging line after line after line, and just checking which test is 🔴 red.
Documentation
Proper naming of each small test later develops into a beautiful set of documentation which is not just easier on the eyes but also helps you find certain pieces of logic related to a specific feature a lot easier. This is why it is not just important to give classes, methods and variables meaningful names, but to also give your tests a meaningful name or description, more on this later.
Testing your Flutter app TDD style
Never heard of Flutter? If so then this is a bit awkward, but not to worry. Check out this great tutorial about writing your first app in Flutter and come back here to pick up on TDD in Flutter.
In Flutter, automated testing falls under three categories:
A unit test tests a single function, method, or class.
A widget test (in other UI frameworks referred to as component test) tests a single widget.
An integration test tests a complete app or a large part of an app.
In this article we will be exploring TDD in Flutter by creating a few widget tests.
We will start by creating a brand new Flutter app, and removing everything so that we have a clean empty screen.

Empty Flutter app
If you have already forgotten, the reason for doing this is because we actually need to write the test first, remember?
We will be creating a simple login screen with input fields for username and password, with a button to login.
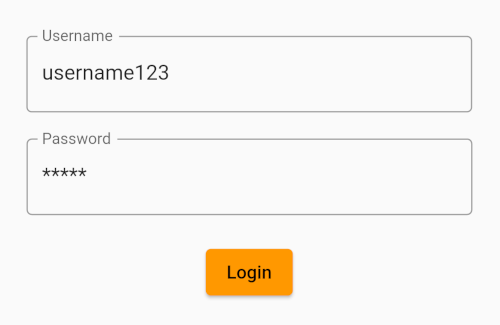
Home Page UI
Widget Test #1
First things first, we need to make sure that when the user opens the app they actually see the controls to be able to login. Nothing more annoying than having a screen that doesn’t display all controls.
Meaningful naming
It is important to group and name tests properly, as this will help narrow down where the failure is, but will also help you navigate through code to find features quicker.
In saying that, we are starting by creating a group to wrap our widget tests of this feature.

Grouping tests
Next, we will add our first widget test, and also give it a meaningful name. Here at Code Heroes we use Gherkin Syntax, which not only makes it easier to name the test, but also to know immediately what the test is testing.

Gherkin Syntax
Gone are the days of naming your test test_usernameInputFieldAndPasswordInputFieldAndLoginButtonPresent or my personal favourite test_home_screen.
With this grouping and Gherkin Syntax, your tests read like a well-formed table of contents.
Finally, let us get to the guts of this test.

Widget test #1
We are creating the empty MyHomePage() Widget and we are expecting to find three Widgets, and we are looking for them by their Key, as this is one of the easiest ways to correctly identify a Widget in the Widget tree.
Run the test… And guess what we will see. That’s right. 🔴 RED!

Failing test
Step 1 done, now it is time to write the code to turn that 🔴 red… into gred… Nope, that’s not right, we want it 🟢 green. Very simple, all we want to do is satisfy the test that we wrote, that is expecting three Widgets.

🔴 Red to 🟢 Green
We have now added three Widgets each with their own Key to identify them. Run the test again and BAM! We see 🟢 green.
Passing test
Now we can start on the next test.
Widget Test #2
Seeing as we are working with credentials, we should probably obscure the password field, which is a great next step for another test.

Widget test #2
Running this test causes a failure.

Failing test
Pretty straightforward to satisfy this test condition, we just need to set the obscureText to true for the password TextField

🔴 Red to 🟢 Green
And now when we run the test again, it is all 🟢 green.
Passing test
Widget Test #3
Let’s do one more, shall we? For this specific app we want to make sure that the user is unable to tap on the login button if they have not provided a username and password, to ensure a better user experience.

Widget test #3
Running this test causes a failure.

Failing test
To satisfy this test there is a bit more work to do compared to getting the previous tests to work. We will need to do the following:
- Add a
TextEditingControllerto each of the TextField Widgets as well as calling a method to check the value of the controller - Add a
boolto enable and disable the ElevatedButton Widget - Add a method to change the value of the
boolvalue based on the text property of the controllers - Convert the
MyHomePageWidget to a Stateful Widget

Step 1

Step 2

Step 3

Step 4
With all these changes, you will notice that the test is still not passing. This is because when changing the state of the app, the Widget Tree needs to rebuild for the state to take effect. This is as simple as adding .pumpAndSettle() after entering the text for each TextField. This is to ensure the _checkValue() method is called, the TextEditingControllers are checked, a new state is set and the build method is completed.

Widget test #3
Run the test again.. and voilà!

Passing test
Refactoring
If you have followed along this far, you would have noticed that the app does not look like the image at the top of this article, and the UI looks very ugly to be honest.
We are going to add some needed padding, alignments, spacing, and we are going to change the character displayed in the obscured password.

We can now rerun all our tests and be confident that the critical features are still working, and if a test should fail we can pin point exactly where to go look to fix the issue.
Conclusion
Even though this is a simple app, it now has very high code test coverage, for the basic controls on the screen, for ensuring the password field is obscured, and for providing a better user experience by only enabling login when there are values in the username and password TextFields.
With these tests you now also have a Table of Contents for all your tests, clearly laying out what is being tested and where, and adding more tests with meaningful names creates a very useful piece of documentation regarding the features of your app. Isn’t it just so pretty?
Home Page UI
GIVEN the Home Page is open THEN I see a username input field AND I see a password input field AND I see a login button
GIVEN the Home Page is open WHEN I type a value into the password field THEN I see the password is obscured
GIVEN the Home Page is open WHEN I type a value into the username field AND I type a value into the password field THEN I see the login button is not disabled
Test Group #2
GIVEN … WHEN … THEN
GIVEN … WHEN … THEN
GIVEN … WHEN … THEN
It might seem difficult at first to wrap your head around the test-driven development (TDD) approach, but as soon as you divide and conquer your feature, it starts to snowball quite easily.
Please feel free to checkout the code that was written for this blog post, which contains step-by-step commits using TDD in Flutter, as well as 2 extra Widget test to extend the test code coverage.
Nice and easy.